Tuesday, December 27, 2011

Weeds!

So, we're about to get personal....

I'm going to tell you a secret.

I like to eat weeds. A lot. I know I've posted about dandelions and chickweed in the past, but now is time for the greatest weed of all time. (Drumroll!!!!!)

Were you ever on a walk or playing in the woods, and you noticed a very spiky ball of ugly weediness stuck to your pants, socks, shoes or companion? My dad and I used to pick them off of the ground and throw them at each other for a very countrified game of "catch." That ugly ball is full of seeds for an amazing plant called burdock. Burdock has been used for centuries as a liver and blood cleanser, digestive aid and a vegetable. The plants will grow anywhere (and everywhere!). They are commonly called "elephant ears" because their slightly fuzzy green leaves are very large. The seeds and leaves are also edible, but I love their roots! My love affair with burdock began in my late teens when I read Susun Weed's book Healing Wise. Once I tasted burdock, I was a goner! I loved digging up burdock where ever it could be found. Burdock has a deep, earthy flavor. It will make you feel amazing.

If you're really adventurous, you can dig your own. Don't dig burdock from the side of the road or any other place that might have pollution-yuckiness. You'll have to use a large shovel, because these kids get really long. Burdock is a biennial, which means that it grows for two years. It's best to get your burdock its first year. First-year burdock is easy to identify, because the second-year burdock will have a large stalk growing from its center, sporting the aforementioned ugly seed pods. Wash it really well.

If you're not really adventurous, you can purchase burdock (also called Japanese gobo) seeds from most seed distributors.

If you're not adventurous at all, go to your local Asian grocery. They will call it "gobo." If they don't have it, open your mouth and ask. I bet they will order it for you.

Now that we've found some, let's cook!

For Burdock and Carrot Kinpira, you will need:

2 long (or 4 short) stalks of burdock, cut into 1 inch pieces (I split it down the middle with a large knife and then chop it at an angle- it's prettier)
3 medium carrots, cut into 1 inch pieces
1 onion, chopped
1 tbs sesame seeds (I use black, but suit yourself)
soy sauce (or tamari, shoyu, Bragg's liquid aminos)
1/2 inch piece of ginger
the juice of 1/2 lemon
a few sprigs of parsley, chopped
1 tsp sesame oil (or other good cooking oil)

Note: You can peel the burdock and carrots if you want to. I just wash mine really well. I generally don't peel vegetables, unless it's absolutely necessary (like when the peel is inedible). If you do chop them, don't throw them down the garbage disposal- put them in your compost pile, please!

Get a large skillet or wok. Pour in your sesame oil and put your burner at medium heat. When the oil begins to heat, pour in your sesame seeds and toast them (they might puff up). It helps to keep the sesame seeds moving as you're toasting them. Next, add your onions. Drizzle with soy sauce. Saute the onions until they soften, then add your burdock. Drizzle with soy sauce. Next, add your carrots and drizzle with soy sauce again ("drizzle" means a couple light shakes of the bottle). If the vegetables get too dry in the pan, add a couple tablespoons of water. Saute for about two minutes, and then lower the heat to low and cover. Let the veggies stew for about 10 minutes. If you want it to taste sweeter, let it cook longer.
To finish, you can either grate your ginger, or press it through a garlic press. Toss the vegetables in the ginger, add your lemon and chopped parsley, and you've got dinner! Root vegetables are particularly good for you in the winter, because they help to keep you warm!

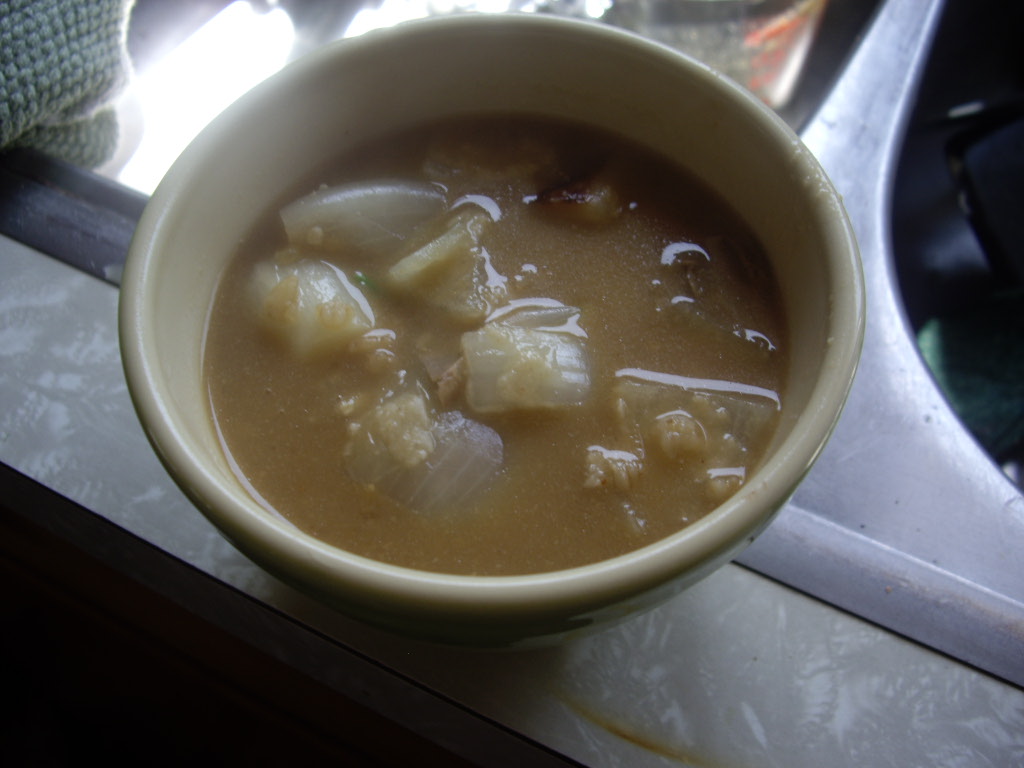
Serve over rice, maybe some fried tofu and a side of steamed greens... Be a grown-up and eat your weeds!

It's Been Way Too Long!!!!

So sorry for the several month long hiatus! For the end of 2011 and beginning 2012, I intend to revamp Because Cooking is Totally Worth it! Coming soon: Homemade Noodles, Salad Dressing, and desserts galore!

Wednesday, July 13, 2011

Mideast Feast


My love of Middle Eastern food began at a restaurant on South Street in Philadelphia on a really hot summer day when I was in college. I grew up in a pretty conventional home, foodwise, and I tasted couscous and was in love! For our Mideast feast, I made pita bread, falafels, the best hummus I've ever tasted and salad.


Pita bread is surprisingly easy and fun (really!). You will need:

2 1/2 c flour of your choice (I recommend a whole grain variety)
1/4 c ground flax
1/4 c vital wheat gluten
1 tbs olive oil
1 tsp salt
1 tsp sugar
1 packet (or 2 1/4 tsp) active dry yeast
1/2 c warm water (and more for the kneading part)

Note: If you don't have flax or wheat gluten, just use 3 cups of flour. I use the flax to add fiber and moisture. I use the gluten because it helps the bread rise faster, but it' not exactly necessary.

First, dissolve your yeast and sugar in your warm water (water should be bath-like- if it's too hot, it will scald your yeast and kill it). Stir it around and set aside.

Mix your dry ingredients in a medium bowl. Once your yeast is activated (it should be frothy and smell like beer), pour the water into your flour mix. This will not be enough water, you will need to add a cup or so- enough that you can knead the dough into a ball. Knead it four about five minutes. Set it in a warm place (In cold weather, I use my oven. In warm weather, I use the back porch) for about an hour (you can let it sit up to over night).

Preheat your oven to 500 degrees. Once the dough has risen (about as long as it takes you to make the other stuff in this feast), knead it for another 5 minutes. You may need to add a little more flour. Next,  break out your rolling pin. If you're feeling saucy (and who doesn't feel saucy when they have a rolling pin in their hands?), chase somebody around your house and pretend that you're going to hit them. When you're done with that, break your dough up into 8-10 little balls. Roll them out on a well-floured surface (I use my cutting board) until they are about 1/4 inch thick.
Place them at the bottom of the oven on a well-oiled surface. When they have been in for about 2 1/2 minutes, flip them over and bake for another 2 minutes.

I was worried that the pitas would turn out like flatbread, but this amazing thing happens in the oven and they just puffed up beautifully!


For the hummus, you will need:

1c chickpeas
1/2 onion
3 cloves garlic
1 tbs dried parsley (if using fresh, use a bit more and make sure you cut it up really well)
1 tsp oregano
1 tsp paprika
2 tbs olive oil

Mix in a food processor and smile at yourself in the mirror for being so awesome! With my old '80s food processor, I have to process the ingredients individually, which is a total pain, but the yum-factor makes it worth it.  If your hummus is lumpier than you would like, add a bit more olive oil.


For the Falafel:

1 can or 1 1/2 c chickpeas
1 onion, chopped
1 garlic clove, minced (if you're a garlic nut, add more. It won't hurt)
1 bunch parsley, chopped well
Juice of 1 lemon
1/2 c whole wheat flour or bread crumbs
add cumin, coriander, cayenne, salt and black pepper to taste

Canola or safflower oil for frying.

Run your chickpeas through a food processor (your food processor is going to be very tired after tonight!), or mash them  really really well. Mix everything together in a medium bowl. I use a large iron skillet for the frying, but a deepish frying pan works well too. Pour oil about 1/2 inch deep into your frying pan and place on medium-high heat. Take your falafel mixture and roll into balls or patties, about the size of the palm of your hand. Once your oil is sizzling, drop your falafels in. Fry for about 3-6 minutes on each side and let cool before serving.

I serve this with a very green salad and I just dump everything into my pita. It's delicious!!!


Saturday, May 14, 2011

Cheeseless Quesadillas

This is a great dish to feed to non-vegans. You won't miss the cheese, I promise! This is also a great dish to make when you're tired or pressed for time. It only takes a few minutes. Serves 4. You will need:

8 tortillas (I use what ever whole-grain variety that is on special at my local grocery. However, if you want the greatest, but Food For Life's Ezekiel sprouted grain tortillas. They are The BEST!)
1 can refried beans (watch labels. Refried beans are often made with pig lard)
1 can black beans (you can also use home cooked beans- you need about 1 1/2 -2 cups)
1 onion, sauteed
1 container of the salsa or pico of your choice (home made recipe is to come- when the tomatoes in my garden are ready- August-ish)
1 cup guacamole (see 7-layer Bean Dip for recipe for your own)
Any other veggies you like- corn (yes, I do know that corn is a cereal grain and not a vegetable), peppers, mushrooms, I've even put shredded carrots in these and they work.

Stuff your tortillas full of ingredients. It works best if you spread your refried beans throughout the tortilla first, because it helps the other ingredients stick together.
Throw your stuffed tortilla into a frying pan and toast on each side for 4-5 minutes each at medium-high.

Wasn't that fun and easy? Pig out, y'all! There is nothing in this recipe that will make you regret it!

Friday, May 6, 2011

Homemade Veggie Burgers


Store-bought veggie burgers can be delicious. They can also be disgusting. No matter what they taste like, everyone agrees that they are expensive. Sometimes being meatless can be tough on your wallet. If you move towards manufacturing your own food, rather than buying the boxed kind, it will save you money and you will have fun (seriously, this is fun!).

I've tweaked this recipe so many times I can hardly remember what it was like in its original form. Be that as it may, these are easy and yummy and full of nutrition. I use black beans, they're my all time favorite, but any beans are really okay here. You will need:

1 onion diced (make the pieces as small as you can)
2 cloves garlic, also diced
1 c black beans (canned or cooked)
1 carrot, shredded
1 stalk celery, also shredded
1/5 package tofu, crumbled (slice about an inch off the block)
2 tbs vital wheat gluten (if you don't have gluten lying around, just use whole wheat flour)
1 tsp cumin
2 tsp ketchup
2 tsp mustard
2 tsp veganaise

Preheat your oven to 400 degrees. Throw all of your ingredients into a medium mixing bowl.

Feel free to play with your veggie here- I've added corn, cilantro, basil, oregano, zucchini, and spinach, all with great results.

The mix should be wet, but not too wet. It actually feels a lot like hamburger (but it isn't, so it's cool). Press it into patties with your hands (kids are great for this, if you've got them) and arrange them onto a baking sheet. I use parchment paper on my cookie sheets, I find that things are less likely to stick to my baking sheet this way.


Bake them for about 20 minutes.


Allow them to cool for 5 or so minutes before removing from pan- if they're too hot, they will fall apart on your spatula. You can wrap in lettuce, tortilla, or serve on bread with whatever fixings you want. Eat up- these are yummtastic!!!!


Tuesday, May 3, 2011

Asparagus Pie

Springtime brings excitement about nature waking up, birds singing everywhere, flowers springing up, and.... Asparagus! Asparagus is, in my opinion, an exemplary vegetable! It's low in calories, high in nutrients, and totally delicious. It's only in season in early spring, so I eat as much of it as I can when it's available. It's great steamed with lemon or any other dressing, but I felt like such a great vegetable deserved it's own entree.


Most vegetable pies feature either meat, creme fraiche, or cheese. I couldn't find a vegan recipe for an asparagus pie that didn't contain some sort of "vegan cheese" ingredient, so I developed this one. I served it at Easter dinner, with many happy faces!

Let's start with the crust. Pie crust can be difficult, but I'll take you through it. When you're done, you're going to be so so so proud of yourself, and you will also be awesome! (Yes, even more than before)

1 3/4 c flour (spelt flour makes a wonderful pie shell- I used my trusty Prairie Gold)
1 tsp sugar (I use organic sucanat)
1 tsp salt
10 tbs Earth Balance (you can also use coconut oil, which has a deliciously buttery flavor)
1 tbs cold water

First, mix your salt and sugar into your flour in a medium bowl. Begin to add your "butter," one tablespoon at a time. It really helps if you have a standing mixer, equipped with a pastry hook. If you don't, mix it slowly with a fork. Continue to add your butter until your dough looks like a bunch of little peas. When your butter is mixed in, add your water and mix until your dough is able to be rolled into a ball. You may want to chill your dough- I left mine in the fridge over night.

The next step is where it gets tricky. Slap on your apron, tie back your hair, and roll out your crust. You will want to flour your pastry cloth (if you don't have a pastry cloth, use some sort of flat, cotton fabric- thin dishtowels, perhaps?) and place your dough in the middle. The trick is to roll it in all directions with minimal pressure. If you add too much pressure, your dough will crack and/or rip and you'll have to start over. Once your dough is flat and pretty (it doesn't really take very long), cut it out into a circle. It helps to place your pie plate upside down on top and cut about a centimeter of extra dough around the edges. Save your scraps, because you will use those for your lattice. Return your pie place to right side up, oil it (I usually put about a tablespoon of EarthBalance onto a paper towel and rub it all over the pan- ooooooh, sexy!), and sprinkle some flour over your butter. Lift your pastry cloth (with the crust still attached), and turn it upside down to place the crust into your pie plate.

For the filling, you will need:

1 bunch of asparagus spears, chopped (save 2 or 3 spears for your lattice)
1 onion, minced
1/2c button mushrooms (optional, if mushrooms aren't your thing)
3 or 4 potatoes
1/4 c unflavored nondairy milk
1 tbs EarthBalance
2 cloves garlic, minced
Juice of 1 lemon (and some zest, it it tickles your fancy)
Whatever yummy herbs you like- I used rosemary and thyme, but savory or parsley would be great here too!

Boil your potatoes- you're going to mash them in a little bit. You can peel them if you want, but I never do. Well-boiled potato skins mash well and most of the nutrition in a potato is in the skin. I generally never peel vegetables, I think it creates unnecessary waste. Saute your onions and mushrooms in a frying pan with a little oil.

When your potatoes are soft (10-15 minutes is all you really need at a rolling boil), remove them from the water, rinse them off, add your EarthBalance, milk, garlic and herbs,  and mash them with a standing mixer or a hand-held. Add salt and pepper to your liking. If they aren't as fluffy as you would like, add a bit more milk and beat longer.

Now, you're finally ready to stuff your pie!!! Preheat your over to 450 degrees. Spoon your potatoes into the pie. Next, add your onion-mushroom mixture.
Be sure to take a couple of minutes to lick your fingers and the spoon or bowl that used to contain your potatoes. Pour your chopped asparagus over the onions. Now, you have a choice. If you want a layered pie, leave it as is. If you don't, press your vegetables down gently with a rubber spatula and they will mix easily into your potatoes. Pour your lemon juice and zest over the top. If you feel like this is impressive enough (you've just totally busted your ass making this pie), you can stop cooking here. However, if you're energetic, frisky, and ambitious, it's time for your lattice!

Remember those couple of asparagus spears that you saved? Cut them lengthwise down the middle. Remember that bit of dough you saved? Roll if out into a long piece and cut the pieces thinly. I had enough dough left for about 6 pieces. Place your asparagus spears lightly on the top of your pie. If you want to be cooler than me, weave your lattice dough pieces into your asparagus spears. If you don't just make a lattice on top of your pie. As you can see from the picture, my lattice was not perfect, but I felt like it was enough.


Now bake this beauty for about 45 minutes. You are going to be the toast of your spring potluck!!!!


Thursday, April 21, 2011

Macrobiotic Soup for Lunch


There's something about soup that makes me fall madly in love every time I make it. I think that its the way that the flavors of each ingredient mix and create new flavors... And there's something incredibly zen about the way that the steam floats upward... Mmmmmmm....

To completely change gears on you... There is a lot of buzz in the vegan community about macrobiotics and it's benefits. I do not follow the macrobiotic philosophy exclusively, but it certainly has benefits. Macrobiotic means "good life." The philosophy is somewhat complicated, but it boils down to a few key ideas. Practitioners emphasize eating whole grains (not their bread products, but the actual seeds), vegetables, seaweed, and fermented foods like miso. Their way of eating intends to bring balance to the body (like yoga!). 

For this barley soup, you will need:

1 inch piece of kombu seaweed (I order this from www.edenfoods.com/ I've never tried this soup without it, but I bet you could if you don't just have loads of seaweed in your cupboard)
1 cup pearled or hulled barley
1/2 cup dried shitake mushrooms (you can really use any mushrooms you want- dried shitakes are my favorite)
3 slices of ginger
6 cups of water
any vegetables you like in your soup (I like carrots and celery in this soup)
1 large onion
3 tbs wheat or oat flour (you can put oatmeal in a coffee grinder and use it, too)
3 tbs red or barley miso
juice of 1/2 lemon
parsley for garnish

Directions: Place the kombu at the bottom of the pot, then add the mushrooms, ginger, any vegetables you are using, barley and water. Cook on medium for 30-40 minutes. When the barley is soft, saute your onion for 3-4 minutes on medium high, until translucent. Add your flour to the onion and coat it well. Pour your onion into your soup and reduce heat. Ladle some of your cooking liquid into a container and add your miso. Miso may take a while to dissolve- I mix it up with a fork. It's important to make sure that you don't boil the miso- it will kill the enzymes in the miso that make miso good for you. When your miso is dissolved, pour it into the soup, add your lemon juice and parsley and serve! I usually remove the kombu and ginger before serving, but if you're a purist, you'll want to eat them. 

I usually eat this soup with fried tofu and steamed collard greens with carrots. Simply saute your tofu with some sunflower seeds or sesame seeds, soy sauce and oil until golden brown. Steam your greens and carrots lightly and then dress them with 1 tsp umeboshi vinegar (a salty, yummy brine) and 1 tsp of flaxseed oil. 

Lunch!!!!

Tuesday, April 19, 2011

Pressure Cooking

If you're a vegan or vegetarian, beans are undoubtedly a staple food for you. Beans are wonderful little magical seeds that provide protein, fiber, vitamins and minerals. I have never met a bean I didn't like! Black beans are my favorite- I think that they taste good in everything!

However, organic canned beans are often 30-50 cents more expensive than their non-organic counterparts. (FYI- watch ingredients, too. Sometimes, non-organic beans, especially the refried varieties sometimes contain pork lard- Gross!) My local grocery store often has a special on their organic canned beans, but not this week, and I had a craving for my black bean stew... What's a lady to do in this situation?

Dried beans (ever organic ones) are cheap and available in most grocery and bulk food stores. I keep some on hand for when the canned varieties aren't available. Dried beans need lots of love and attention, though, and if you don't have 3 hours between work and dinner, they can be a serious pain. Again, what to do?

Soaked beans can cook in a pressure cooker in about 5 minutes. I know pressure cookers are out of style, but they are making a pretty great comeback (like skinny jeans and day-glo? Hmmmmmm...). Here's what I did: I stuck a cup of dried beans in 3 cups of water out on the kitchen counter when I left for work. When I got home, I  rinsed them off in a strainer and stuck the beans in my pressure cooker. You need 3 cups of water per 1 cup of beans. If you have some kombu seaweed lying around, stick some in the bottom of the pot for extra minerals. I pressure cooked them for about 5 minutes, and I let the pressure drop naturally (this just means that you turn off the heat and go walk your dog). When I got back from walking my dog, I had 3 cups of perfectly cooked beans. I then removed the beans and water, threw all of the ingredients of my favorite black bean stew (check this blog's homepage, it's here) i back into the pressure cooker. I cooked that for 5 minutes, let the pressure drop naturally (again, let it sit while you make a salad and set the table), and I have dinner. Quick, easy, nutritious... Awesome!

Thursday, April 14, 2011

Indian Feast!


Indian food is where it's at! I love it! However, my area had a sad and serious lack of Indian restaurants, so if I want good Indian food, I have to rely on my own skill. Chana Masala is an easy and very basic Indian dish. I also attempted to make Naan, an Indian flatbread, which was tasty, but not very flat.

For the Naan:

Preheat your oven to it's lowest temperature and place some boiling water in a pyrex dish inside the oven. (The water helps the bread to rise and form a nice crust)

You will also need:
1 packet active dry yeast
1/4 c warm water
1 tsp sucanat, sugar or agave
1 1/2 tsp ground flaxseed
2 tbs water
3 1/2 c whole wheat flour (again, I use Prairie Gold)
1/2 c vital wheat gluten (I use this because it makes a whole wheat bread rise better)
1/2 tsp salt
6 tbp nondairy butter (I use Earth Balance), soft or melted
1/3 c non dairy yogurt (plain)
1 c nondairy milk (I usually use Almond Breeze)

Dissolve your yeast in your warm water. Add your sugar to help activate the yeast and stir it well. Allow it to sit for 5 to 10 minutes, while you mix up your flour. Stir flour, gluten, and salt into a bowl. In a separate, small bowl, whip your flaxseed together with 2 tbs of water. Once your yeast mixture is all frothy and beer-scented, pour it into your flour. Also add your flaxseed mixture, your yogurt, 2 tbs of your butter, and your "milk." Stir it enough to make a dough. Your dough should form a ball easily and not be too sticky. If it's too sticky, add flour. If it's too stiff, add milk. Turn off your oven, cover with a wet cloth, and let sit for 2 hours. Go dance around your yard or something equally fun and silly.

After the 2 hours are over, remove your bread from the oven, and preheat oven to 450 degrees. I always leave the pyrex container with the water in there. Knead the bread for about 5 minutes (if you have an electric stand mixer, use it!). Divide it into about 8 equal balls and roll them out until they are about 1/4 inch thick. Oil your pan well and drizzle the rest of your "butter" over the bread. Bake for about 8 minutes.


For the Chana Masala, you will need:

1 large onion, diced
2 or 3 cloves of garlic, minced
1 tbs oil (for sauteing, I use high-heat safflower oil)
1 can diced tomatoes
1 can chickpeas, please make sure you rinse and strain
1 tsp minced ginger
1 tsp (or more!) garam masala or curry powder
3 tbs nondairy yogurt, plain
the juice of 1 lemon
parsley or cilantro to garnish

Saute your onions and garlic in a large frying pan or wok at medium-high for about 5 minutes. I usually let the oil heat up while I do my chopping. Next, add your tomatoes, chickpeas, ginger and spices. Reduce the heat to medium and cover. If you want to add more spice, do. Let this "stew in it's own juices" for as long as it has enough liquid to cook in. This is a great dish to make for guests who are chronically late, because you can lower the heat and let it sit around like a stew. It only gets better. At least let it stew for 20 minutes. About 5 minutes before serving, stir in your yogurt and your lemon juice. Right before serving, add your garnish.  Either serve over rice or with your bread. A raw salad pairs well with this.

Eat up! It's delicious and good for you!

Tuesday, April 12, 2011

Why Organic?

Organic food is more expensive. The cost of living is rising because of the rising cost of fuel and you already have insane amounts of bills to pay. You're not made of money, right? Me either. So, why organic, especially if it costs so much?!?!

Organic food does not contain pesticides. Pesticides, you remember, are designed to kill bugs. They also kill birds and rabbits and other animals who make their homes outside. Pesticides kill earthworms, who are actually necessary for us to sustain life on this planet (yeah, I know they're weird and gross, but we can't live without them). Anything that is designed to kill something can't be yummy and healthsome. Furthermore, pesticide residues wash away when it rains and end up in ground water, and travel to lakes and streams and faucets. Gross! It also isn't sustainable.

Most companies who manufacture food aren't concerned about sustainability, environmental issues, or our health. They are, however, concerned about where we consumers spend our money. Your dollars are the greatest force of change in this situation. They're also really important to you, because you need them. I can't afford to buy everything organic, so here are some "rules" that I follow:


1. Try to buy local food that is in season. Local food is cheaper because it doesn't have to travel far. Gas prices are unreasonably high and using tons of it creates all manner of yucky environmental chaos. Check out your local farmers market. If you don't know where that is, check out www.localharvest.org.

2. Follow the rules of the "Dirty Dozen" and the "Clean Fifteen." If you don't know what I'm talking about, check out http://www.pbs.org/wnet/need-to-know/health/the-dirty-dozen-and-clean-15-of-produce/616/.

3. Don't buy anything from South America that doesn't have a thick skin. DDT is still legal for use in South America, and it's still incredibly dangerous.

4.  Don't buy manufactured snack food. Junk is junk. Even if it's organic. Things like chips and candy and donuts are crap. The organic version might eschew high fructose corn syrup and trans fats, but it's still crap for your body and tough on your wallet.

5. If you're not vegetarian or vegan, practice "Meatless Monday." Meat consumption is hard on the environment and hard on your body. Check out www.meatlessmonday.com for more information.

Ultimate Morning Smoothie

Waking up is tough. Making time to get a nutritious breakfast is also tough. "They" say that breakfast is the most important meal of the day, and I agree. Your breakfast sets the tone for the rest of your day's eating...

So if I have a Coke and a box of Dots (they're vegan!), my blood sugar is going to spike and crash, and it's likely that I'll want more way before lunch time. Constantly unstable blood sugar will also put you in a bad mood, because the high spikes and crashes are a lot like bipolar disorder. Yuck! 

I love smoothies. I especially love green smoothies. It's a great way to get more greens into your belly, and you can't taste them when they're blended with a bunch of fruit. Awesome!!!!


This smoothie serves 2, but I usually drink the whole thing myself. You will need:

1 banana
1/2 c of berries, frozen or fresh (I used frozen blueberries)
1 container soy yogurt
1 tbs ground flaxseed
1 tbs wheat germ
1 generous handful of greens (I prefer spinach for smoothies, it blends nicely)
1 c water (you may want more; I like a "thinner than a milkshake" consistency)
1 handful of ice cubes (especially if it's a hot day)


Simply throw all of your ingredients into your blender and blend until they aren't ingredients anymore!

Feel free to play with your food: Use mango, kiwifruit, pineapple, strawberries, cherries, raspberries, blackberries- whatever you want.  If it doesn't taste good like fruit (it should), add some orange juice or some stevia.

Truth in advertising: Depending on what fruit you use and how many greens you add, your smoothie might turn out to be an odd, unappetizing color. I drink mine out of a colored bottle, so if it looks nasty, I can still drink it in public without too much unnecessary commentary.  

Monday, April 11, 2011

7-Layer Bean Dip- The Ultimate Party Food!!!


This is one of my favorite things to eat EVER! It's pretty quick and easy, and it's just delicious! You will need:

1 can refried beans
1 tsp cumin
1 tsp chili powder
1 small can green chilies
1 c guacamole (recipe to follow)
1/2 medium onion, minced
1 container vegan sour cream (I use the Tofutti brand- it's delicious!)
1 jar salsa or pico de gallo
1 block vegan cheddar cheese (I use Follow Your Heart Vegan Gourmet)
black olives (optional)

To make your own guacamole:

2 avocados
3 cloves garlic
1/2 onion, minced
2 tbs lime juice
1 tsp sea salt

First, peel your avocados, chop and place in a small bowl. I run my garlic through a garlic press, but you can mince if you like. Add all of the ingredients together and mash with a fork.

So now you're ready to start your bean dip. Preheat your oven to 350 degrees. Pour your refried beans into a large casserole dish. Add your cumin and chili powder and mix well.


Next, pour your salsa or pico over your beans.

Next, place your chili peppers and onions lightly on the top.

Now, add your sour cream.


It's impossible to put in the sour cream without getting some other ingredients in it. That's okay. Now, add your guacamole.


Now, I know I bashed vegan cheese in earlier posts. This cheese works in this recipe. Anything mixed with beans and salsa tastes great! Shred your vegan cheese and place on top.


I mix a little bit of leftover salsa in with the cheese. If you're adding black olives, arrange them on the top.

Place in the oven for 30-45 minutes at 350. Go take a  shower before your party. Seriously, this is the best party food I've ever made.


Note: Play with your layers. Corn, green peppers. jalapenos, cilantro, whole black or pinto beans, or tomatoes are great in this. I've been known to heat the leftovers and serve it over rice the day after the party.

Sunday, April 10, 2011

I am Featured on The Chris Taylor Show!

http://christaylorshow.com/ I was interviewed yesterday on The Chris Taylor Show podcast. Check it out! Warning: explicit language (not on my part, it's the host ; - ) )

Tofu Sandwich

Tofu has a terrible reputation that keeps people from ever wanting to try it. When I tell meat-eaters that I'm vegan, one of the first things I hear is, "OMG! How do you eat tofu?!?!?!" The truth is, I love tofu. However, to love tofu, you need to know what to do with it. I promise to add more recipes soon, but this is one of my favorites. The tofu sandwich is easy and quick and cheap, I have one every Saturday after I've finished my house chores.
You will need:
Raw Sunflower Seeds
2 Slices of Tofu (about 1/2 inch thick)
2 pieces of toast (my favorite is Food For Life's Ezekial bread)
Veganaise
Mustard
Greens
Tomatoes
Whatever else you like on your sandwich

First, grab a small frying pan and put a little bit of oil (I use high-heat safflower oil for my frying needs) at the bottom. Add a tablespoon or two of sunflower seeds and drizzle them with Braggs Liquid Aminos or soy sauce. Toast them at medium heat.

Next, add your tofu and drizzle with Braggs or soy sauce.


Fry them on each side until they are browned.


I put Veganaise on both pieces of toast and then I mix mustard with it. I add some greens and sometimes onions, tomatoes are great, but they aren't in season right now, so I don't have any. Cucumbers are also great on this sandwich. Put whatever else you like on your sandwiches and chow down!

Saturday, April 9, 2011

Free Salad!!!!


Anything for free is better than anything you have to pay for. Especially food! It's early spring at the moment, and now is the time for foraging. Yes, foraging, like our ancestors. Edible wild plants. Free and delicious.

Our culture doesn't always do things that makes sense. Consider dandelions. Lawn care companies are on a rampage to eradicate these "weeds" that do little more than add some yellow to the landscape (yeah, they're a pain in the garden, but they are easy to pull right out. I've never had plants I was growing intentionally be choked out by dandelions). Virtually every "lawn fertilizer" contains some sort of "broadleaf weed killer" and the most these "fertilizers" provide is a bad smell and unnecessary water pollution.  Then, when you walk through the "gourmet" bit of your local produce market, you'll undoubtedly see dandelion greens next to the baby corn and parsnips. WHAT?!?!?!?!?

Dandelions grow for free in my yard, and I eat them. They're incredibly nutritious (check out http://www.leaflady.org/health_benefits_of_dandelions.htm), yummy, and free. Most vegan writers will tell you not to forage your own for fear of pesticide residue, but if you know what is growing in your area- do it!!! The taste is a little spicy, so you may want to mix them with other greens. Just wash them well, chop up, add the dressing of your choice, and chow!

Green Juice


Did you ever stay up all night on a Tuesday and watch Jack LaLane's infomercial? The benefits of juicing when you can't sleep! Probably never gave it a second thought, right?

I'm a big fan of juicing, especially in the summer. Homemade juice really gives your body a great boost to get your day going. It's also a great way to get more vegetables into your belly. I generally use whatever I have around for vegetables. The beautifully green elixir your see above consists of:

1 leaf swiss chard
1/3 cucumber
1 small carrot
a handful of spinach
a handful of parsley
a small piece of ginger
1 small green apple


If you have a good juicer, this serves 2. I have a Breville. The Jack LaLane is pretty good, too. I've also tried the Juiceman, and it is no good at all.

Does the color turn you off? My green juice is super green. If you're not ready for it, try more cucumber or some celery with carrots and apple. I also love adding beets. Lemons are great, too, especially if you have a cold.

Friday, April 8, 2011

String Gardening!

I decided to post this because it is marginally relevant to vegan life (and I think it's one of the supremely coolest things I've ever seen!)... String gardening. This is my first attempt.
Here's how I did it: I bought a seedling (this is rosemary). I removed it from its original container. I then wrapped the roots loosely in some string. I then made a ball of potting soil around the root system, about 1/4 inch thick. To hold the soil in place, wrap a layer of moss around your ball of soil and then secure by wrapping more string around. I'm not sure if this is an exact science- I just did it all willy-nilly and it's staying together nicely.

Thursday, April 7, 2011

Vegan Cheeseless Pizza!


Living without cheese can be tough. But living without pizza... NEVER!!!!! Life without pizza isn't worth living. Life without cheese... Well, cheese has casein in it which is a hardship for one's digestive system, and unless you're buying your cheese from an organic farmer who practices sustainable agriculture and treats his or her cows like gold, it isn't worth the environmental impacts or the animal suffering. I've tried vegan cheeses, but they just don't do it- some of them have flavors reserved for war criminals and sex offenders. So... Pizza....

To make the dough, you will need:
3 c whole wheat flour (I use Prairie Gold, it's my fave)
1/4 c ground flaxseed
1/4 c vital wheat gluten
1 tsp salt
1 packet or 21/2 tsp bread yeast
1/2 c warm water
1 tsp sucanat, agave nectar, honey or sugar
1 tbs olive oil
fresh, frozen or dried herbs to your liking
1 large bowl
1 small pyrex bowl
1 rolling pin

Okay... Tie back your hair, put on that apron that Aunt Mildred got you when you graduated college (OMG- where is that?!?!?!), and remove your jewelry. Put some water on your stove to boil and turn your oven on to its lowest setting. Mix your flour, flax, gluten and salt into your large bowl.

 Next, mix your yeast, water and sugar together. Water should be warm, but not hot. Like bath temperature. Stir them together and let sit for about 5 minutes. The water should get frothy and smell like beer.

Next, pour your yeasty water (mmmm, sounds sexy!) and your oil into your flour mixture and mix well. You will have to mix more water to get the dough to the right consistency.  I use an upright mixer for this (Christmas 2009, thanks, hubby). If you don't have an upright mixer, USE YOUR FINGERS (or your kids' fingers). Add about another cup or cup and a half to the dough and either mix in your mixer with the pastry hook, or grab onto it and knead. If you took ceramics in high school, try to channel that feeling. If you didn't, mix the dough into a ball and grab it by the sides. Turn it around and push down on it. Repeat this process for about 5 minutes and think about how cooking burns calories. If you want to add herbs to your dough (and I strongly recommend that you do), now is the time. I always add some rosemary, oregano, garlic and basil. Sun-dried tomatoes are great, too. Your dough should feel slightly elastic. If it's too sticky, add a little flour until it doesn't leave sticky bits of itself all over your fingers. If it's too clumpy, add a little more water. When it's right, it will look like this:

Remember, way at the beginning when I told you to put water on the stove to boil? Pour some of that hot water into a pyrex bowl and place the bowl in your oven. This helps the dough rise. It's a great old secret that I learned from my mom. Don't tell anybody, and you'll be the awesomest bread maker around. Feel free to leave it in the oven during the baking process for a crustier crust. Your oven should be warm, and you should turn it off right about now. If it's a warm, sunny day, you can let your dough rise outside. Keep your dog away from it (yeah, it has happened to me). Cover your bowl with a damp cloth and leave in the oven for about an hour. 

Wow! What a process, right? It's going to be worth it when you sit down and eat this pizza. My husband and I are such total pigs that we've polished off one of these bad boys in one sitting. Shameful? Perhaps. Okay, so now your dough is risen like Easter. Take it out of the oven and knead it again for about 5 minutes. If it's all sticky and spongey, add about 1/4 c of flour or vital wheat gluten. It should be not sticky and slightly elastic. Preheat your oven to 400 degrees. Oil your pizza pan, and place the dough ball on top. Roll it out with the rolling pin. Roll from the center and in all 4 directions, so your crust is nice and even. You may want to periodically turn it over, so that it rolls really well. Once your dough is circular and the same size as your bakeware, make little indentations all around the circle for the crust. It should look something like this:

Notes about this crust: You can make 2 pizzas with this amount of bread. I like a thick crust, but if you don't, simply cut your dough ball in half and make two. You can also freeze a dough ball for a quick and easy pizza night later. I've certainly had times where I've doubled this recipe specifically for that purpose. Also, if pizza is not your bag, this recipe makes a mean crusty Italian loaf. Simply roll it into a cylinder and place on a well oiled baking sheet. Bake at 400 degrees for 30 or so minutes.

Now for the toppings! The pizza in the picture contains:
 1/8 c Pesto (from the jar or homemade- we will make pesto on this blog, but not until fall when the basil is ready)
2 leaves Swiss Chard (you can use collards or spinach)
1/2 jar of pasta sauce (again, recipe to follow, but in the fall when the tomatoes are ready)
3 cloves of garlic minced or pressed in garlic press
All the oregano and basil you can handle
1 tsp rosemary
1 head of broccoli
4 or 5 mushrooms
1/2 onion
Black olives
Note: I saute my onions and mushrooms before I put them on the pizza.

First, wet your hands and run them over your dough. This helps the dough form a crustier crust. Next, spread out your pesto with a rubber spatula or the back of a spoon. Don't apply too much pressure, or you'll rip your dough. If you're concerned about fat content, skip the pesto.
Then, de-stem your greens (I use chard because the organic variety is inexpensive). Place them on top. The reason I put the greens on at this stage is because they help the bread from getting all soggy. It's also a great way to get more greens into your mouth.
Now, add your sauce. I usually pour the sauce into the middle of the pie, add my herbs and my garlic, and then spead it out to the edges in a circular motion with the back of my spoon. This way, my herbs get spread out evenly. 

Now, add your toppings. I'm a total nerd- I like to put my toppings on in the shape of a heart or a smiley face. Don't feel like you have to be hokey- it's just how I roll.


Now, bake in the oven for about 20 minutes- until your crust is crusty and your veggies are cooked. 

Now, pat yourself on the back for doing something amazing, and then PIG OUT!!!!

Note: Let your pizza cool for about 10 minutes before you cut it. It will be difficult. Also, the first piece might be stubborn. Take your largest and flattest spatula, and run it along the outside of the crust. This will help it lift easily. Make sure you cut it really well, or your toppings will fall off.